


What is SwiftUI ?
In WWDC 2019 Apple announced a completely new user interface development framework called SwiftUI. SwiftUI is a user interface toolkit that lets us design apps in a declarative way. There was lots of talk about whether we should use Storyboard or build UI programmatically. SwiftUI is the answer to all these questions. You can now develop the app's UI with a declarative Swift syntax.
Benefits of Using SwiftUI:
Simplifying the Syntax:
Wouldn’t it be better if you could just state what your user interface should do? Then SwiftUI is your thing. SwiftUI allows the developers to simply write what the interface should do. Whether it is describing the alignment, or putting hues to the rather depressing field, with SwiftUI you can not only save time but maintain the code better.
Aestheticize the tools:
Apart from declarative and simplified syntax, Xcode has made building the interface using SwiftUI easier than before. What it does is makes the editing stay completely in sync with the code adjoining the editor. You can see the code you are writing as the preview option remains open. Along with that, you can also view your UI in multiple configurations.
Making replacements:
The Swift runtime as well as the compiler is fully embedded throughout Xcode. This allows the application to be constantly built and run without any interruption, therefore, the live app that you see in the UI is not just an approximation of the User Interface, but the live one. The Xcode allows the developer to swap and edit the code directly in the live app so that testing and dynamically replacing the codes to suit your purpose can be accomplished without any issues.
Preview your creation:
The option to replace the code live will not be effective if it hadn’t been for the preview provision. Creating one or many previews of any SwiftUI to get sample data will allow you to understand what works for you and what does not.
No more storyboard, Interface Builder and Auto-layout
Earlier we used to develop user interfaces with storyboards, xib's and auto layout. But with SwiftUI, storyboard and auto-layout are completely out of the picture. Now the code editor is available with a preview canvas.
Migrating from UIKit to SwiftUI
If you've used UIKit before then you need to understand what's the UIKit component equivalent in SwiftUI. Many of the classes you know just by removing prefix UI but few have been renamed. Let's have a look at the list.
1. UIViewController: View
2. UITableViewController: List
3. UITabbarController: TabView
4. UINavigationController: NavigationView
5. UIAlertController: Alert
6. UIAlertController with style .actionSheet: ActionSheet
7. UILabel: Text
8. UITextField: TextField
9. UITextField with secure entry: SecureField
10. UISwitch: Toggle
11. UISlider: Slider
12. UIButton: Button
13. UIStackView with horizontal axis: HStack
14. UIStackView with vertical axis: VStack
15. UIImageView: Image
16. UISegmentedControl: SegmentedControl
17. UIStepper: Stepper
18. UIDatePicker: DatePicker
19. UIPickerView: Picker
20. UITabbar: TabView
21. UINavigationBar: NavigationView
22. UIScrollView: ScrollView
Creating Project:
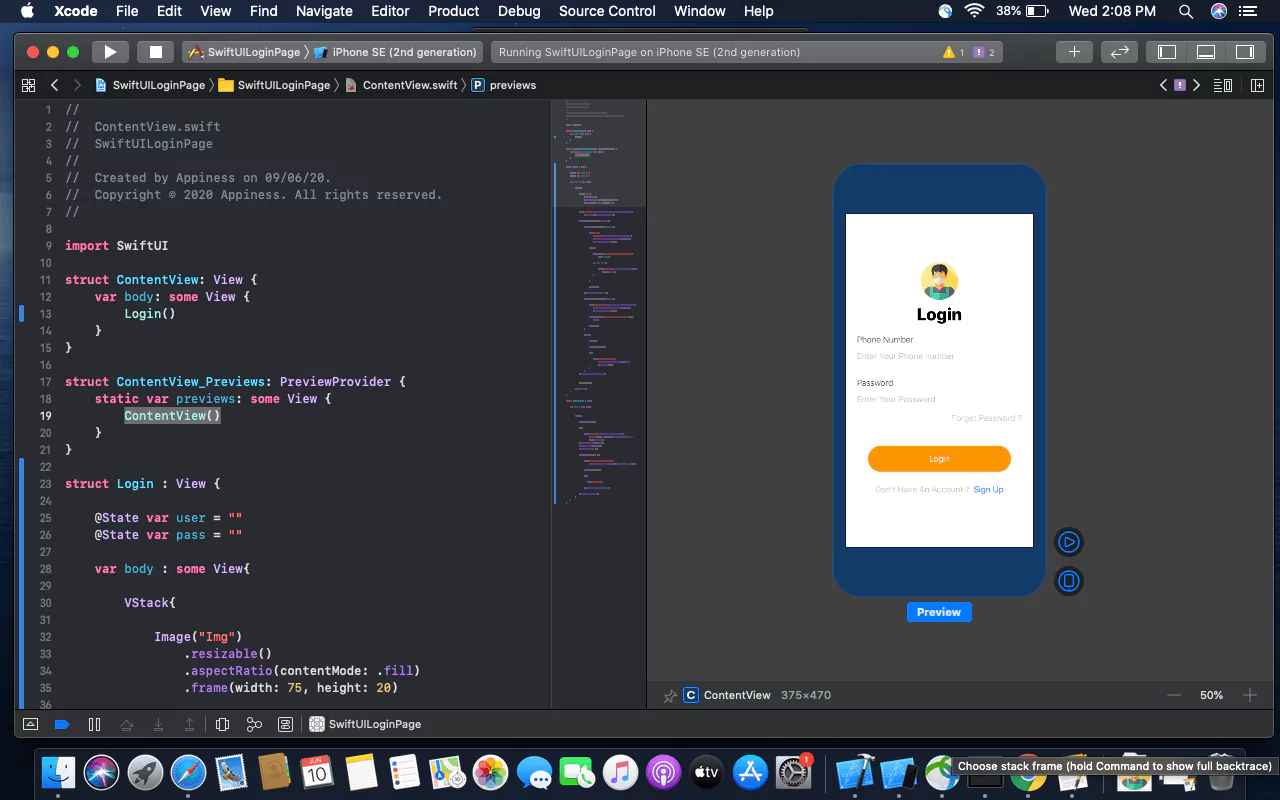
Step 1 - Creating a new project with SwiftUI
Step 2 - Add the VStack in the View. It will act as Vertical StackView
Step 3 - Add title text as Login in the View and can set style to the Text.
Step 4 - Adding Image to the top of the Screen to show that its user's login and adding frame of width and height as shown below.
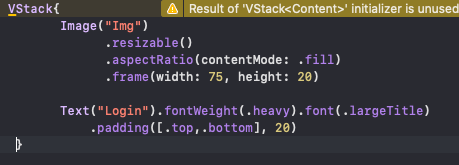
Fig 1 - Adding Image and Text
Step 5 - Adding Text Field for Phone Number and password with TestField and SecureField inside the VStack and Alignment to leading.
Step 6 - Adding placeholder to the textfield , Add Text and Value will be saved in the Variable.
Step 7 - Give Divider() for allowing space between two textfield and add style as required for the textfield to be displayed.
Step 8 - Adding padding to bottom and given 15.
Step 9 - Adding Button of forgot password inside the HStack to align the right corner of the screen with the Text as shown below.
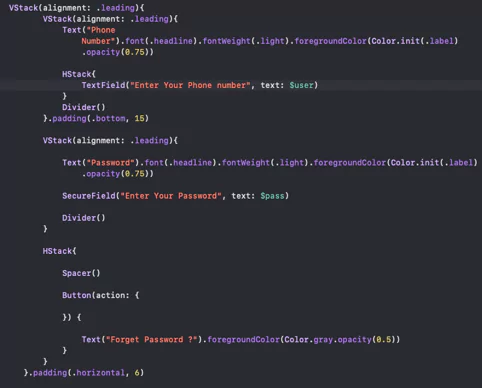
Fig 2 - Adding Textfield and SecureField with Forget Password
Step 10 - Add a button with the title “Login” for clicking the login functionality inside the VStack.
Step 11 - In this button Action will be added inside the action closure function and can add text to the button (i.e Title) and Style the button as shown.
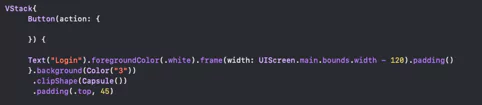
Fig 3 - Adding Button with Action and Text
Step 12 - Add a button which will have an action to move to SignUp Screen inside the HStack with spacing. Where the SignUp text will be clickable which we implement using Attribute text Similarly in SwiftUI it is implemented in Simple Way.
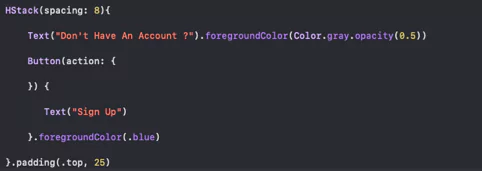
Fig 4 - "Don't have an Account ? Sign Up"
Final Result - Login Screen with Phone Number and Password using SwiftUI

Conclusion
SwiftUI is new to everyone and might take time to get stable as a framework. But SwiftUI is the future of iOS development. There are a lot of things to learn in SwiftUI. Contact Appiness Interactive, a trustworthy IOS app development company in Bangalore, to build your website effectively.